1.Popover气泡卡片
点击/鼠标移入元素,弹出气泡式的卡片浮层。
2.何时使用
当目标元素有进一步的描述和相关操作时,可以收纳到卡片中,根据用户的操作行为进行展现。
和 Tooltip 的区别是,用户可以对浮层上的元素进行操作,因此它可以承载更复杂的内容,比如链接或按钮等。
组件代码来自: 气泡卡片 Popover - Ant Design
3.本地验证前的准备
参考文章【react项目+antd组件-demo:hello-world react项目+antd组件-demo:hello-world_react+antd 表格demo-CSDN博客】,将 气泡卡片 Popover - Ant Design 中需要在本地使用的代码复制覆盖App2.js中的全部代码,启动代码,可在本地查看现象和更改代码。
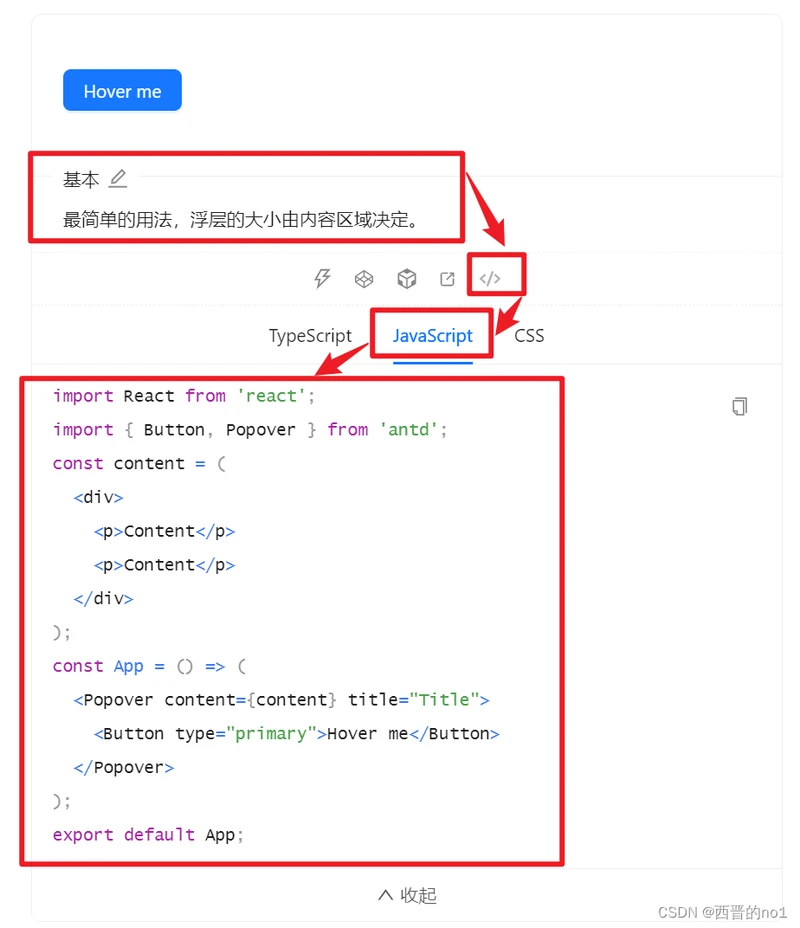
4.本地验证Popover的简单用法
复制下图所示代码,了解Popover的简单用法。注意可以不复制CSS中的内容。

import React from 'react';
import { Button, Popover } from 'antd';
const content = (
    <div>
        <p>Content</p>
        <p>Content</p>
    </div>
);
const App = () => (
    <Popover content={content} title="Title">
        <Button type="primary">Hover me</Button>
    </Popover>
);
export default App;5.查看3种触发方式的使用方式
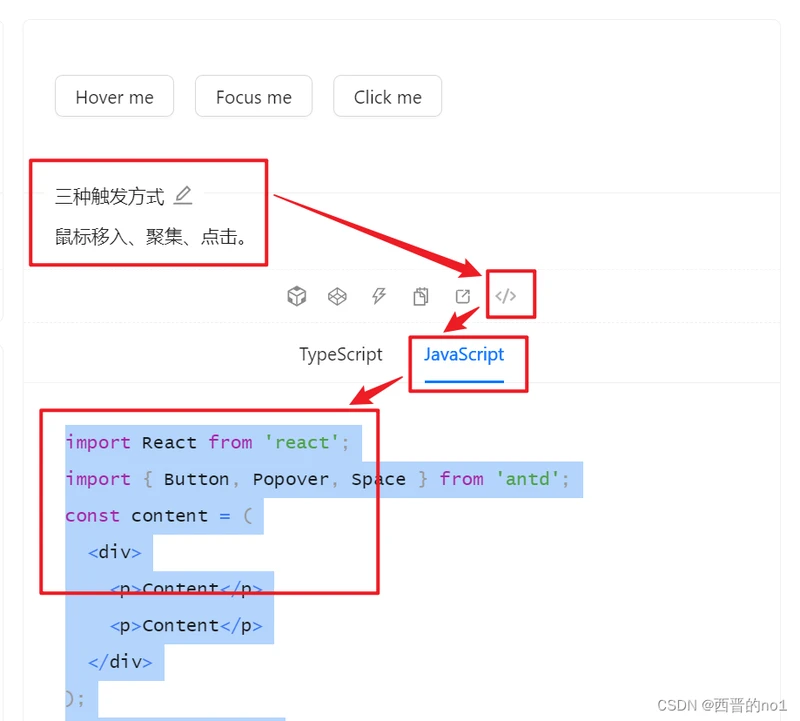
复制下图所示代码,了解Popover的3种触发方式。具体方式可参考: 文字提示 Tooltip - Ant Design

import React from 'react';
import { Button, Popover, Space } from 'antd';
const content = (
    <div>
        <p>Content</p>
        <p>Content</p>
    </div>
);
const App = () => (
    <Space wrap>
        <Popover content={content} title="Title" trigger="hover">
            <Button>Hover me</Button>
        </Popover>
        <Popover content={content} title="Title" trigger="focus">
            <Button>Focus me</Button>
        </Popover>
        <Popover content={content} title="Title" trigger="click">
            <Button>Click me</Button>
        </Popover>
    </Space>
);
export default App;6.查看设置气泡 12 个方向的方法:placement
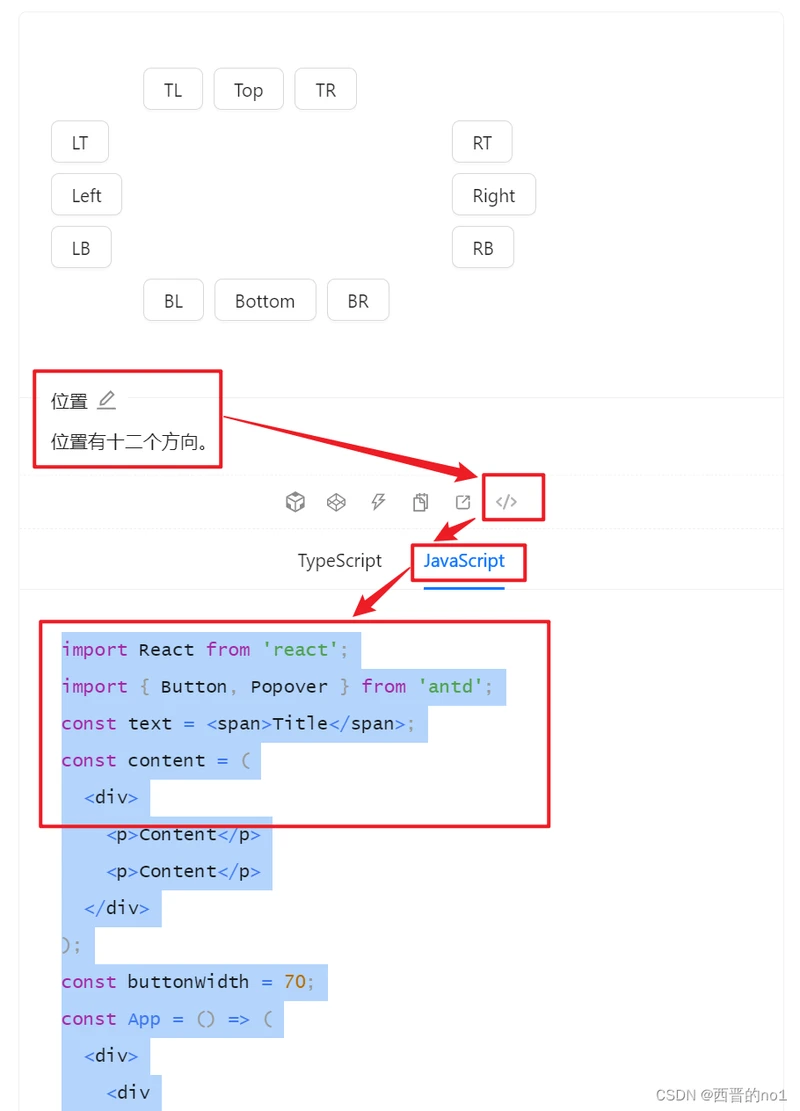
复制下图所示代码,了解如何设置气泡 12 个方向:placement。
气泡框位置,可选 top left right bottom topLeft topRight bottomLeft bottomRight leftTop leftBottom rightTop rightBottom。
具体用法参考下述源代码,或: 文字提示 Tooltip - Ant Design

import React from 'react';
import { Button, Popover, ConfigProvider } from 'antd';
const text = <span>Title</span>;
const content = (
  <div>
    <p>Content</p>
    <p>Content</p>
  </div>
);
const buttonWidth = 80;
const App = () => (
  <ConfigProvider
    button={{
      style: {
        width: buttonWidth,
        margin: 4,
      },
    }}
  >
    <div className="demo">
      <div
        style={{
          marginInlineStart: buttonWidth + 4,
          whiteSpace: 'nowrap',
        }}
      >
        <Popover placement="topLeft" title={text} content={content}>
          <Button>TL</Button>
        </Popover>
        <Popover placement="top" title={text} content={content}>
          <Button>Top</Button>
        </Popover>
        <Popover placement="topRight" title={text} content={content}>
          <Button>TR</Button>
        </Popover>
      </div>
      <div
        style={{
          width: buttonWidth,
          float: 'inline-start',
        }}
      >
        <Popover placement="leftTop" title={text} content={content}>
          <Button>LT</Button>
        </Popover>
        <Popover placement="left" title={text} content={content}>
          <Button>Left</Button>
        </Popover>
        <Popover placement="leftBottom" title={text} content={content}>
          <Button>LB</Button>
        </Popover>
      </div>
      <div
        style={{
          width: buttonWidth,
          marginInlineStart: buttonWidth * 4 + 24,
        }}
      >
        <Popover placement="rightTop" title={text} content={content}>
          <Button>RT</Button>
        </Popover>
        <Popover placement="right" title={text} content={content}>
          <Button>Right</Button>
        </Popover>
        <Popover placement="rightBottom" title={text} content={content}>
          <Button>RB</Button>
        </Popover>
      </div>
      <div
        style={{
          marginInlineStart: buttonWidth,
          clear: 'both',
          whiteSpace: 'nowrap',
        }}
      >
        <Popover placement="bottomLeft" title={text} content={content}>
          <Button>BL</Button>
        </Popover>
        <Popover placement="bottom" title={text} content={content}>
          <Button>Bottom</Button>
        </Popover>
        <Popover placement="bottomRight" title={text} content={content}>
          <Button>BR</Button>
        </Popover>
      </div>
    </div>
  </ConfigProvider>
);
export default App;
7.不随页面滚动而滑动
悬浮出现popover气泡卡片,但气泡卡片随着滚动条滚动改变位置,如何解决这个问题呢?
在代码中给元素 Popover 添加一个属性 getPopupContainer={triggerNode => triggerNode.parentNode},
并且附近标签要有position:'relative'。
8.指定弹出页面的尺寸
在代码中给元素 Popover 添加一个属性 overlayStyle={{height:"100px"}},具体样式在其中进行设置。
9.指定弹出页面的显示层次
在代码中给元素 Popover 添加一个属性 zIndex={10},具体值根据实际情况进行设置。
本文仅介绍了组件Popover的部分内容,更多内容请参阅官方文档: 气泡卡片 Popover - Ant Design
