
使用curl等客户端工具即可通过Restful API对Elasticsearch进行操作,但也有一些客户端工具提供对于ElasticSearch更加友好的可视化操作支持,比如cerebro。这篇文章介绍一下如何使用cerebro对Elasticsearch7.3.0版本进行操作。
概要信息
cerebro概要信息如下表所示:
| 项目 | 说明 |
|---|---|
| 开源/闭源 | 开源 |
| 源码管理地址 | https://github.com/lmenezes/cerebro/ |
| License类别 | MIT License 2.0 |
| 开发语言与框架 | Scala, Play Framework, AngularJS , Bootstrap |
| 当前稳定版本 | v0.8.4(2019/5/22) |
| 下载地址:github release | https://github.com/lmenezes/cerebro/releases |
使用方式
cerebro需要JDK1.8或者更新的版本予以支持,最简单的方式莫过于使用Docker镜像方式启动服务了。
docker启动方式
使用docker命令方式直接启动:
docker run --name cerebro -d -p 9100:9000 lmenezes/cerebro:0.8.4
docker-compose启动方式
也可以使用如下docker-compose.yml启动
[root@host131 cerebro]# cat docker-compose.yml
version: '2'

services:
  # cerebro service
  cerebro:
    image: lmenezes/cerebro:0.8.4
    ports:
      - "9100:9000"
    restart: "no"
[root@host131 cerebro]#
事前准备
环境准备
可参看如下内容:
- https://liumiaocn.blog.csdn.net/article/details/82493192
环境确认
确认ElasticSearch服务已正常运行,并可以通过curl或者浏览器等客户端进行访问。
[root@host131 cerebro]# curl http://localhost:9200
{
  "name" : "cf0d6d229281",
  "cluster_name" : "docker-cluster",
  "cluster_uuid" : "AekExd6CS06w3Kax0-vOrw",
  "version" : {
    "number" : "7.3.0",
    "build_flavor" : "default",
    "build_type" : "docker",
    "build_hash" : "de777fa",
    "build_date" : "2019-07-24T18:30:11.767338Z",
    "build_snapshot" : false,
    "lucene_version" : "8.1.0",
    "minimum_wire_compatibility_version" : "6.8.0",
    "minimum_index_compatibility_version" : "6.0.0-beta1"
  },
  "tagline" : "You Know, for Search"
}
[root@host131 cerebro]#
启动cerebro服务
这里使用docker-compose的方式启动ElasticSearch服务(事前已下载了相关的镜像)
[root@host131 cerebro]# docker-compose up -d
Creating network "cerebro_default" with the default driver
Creating cerebro_cerebro_1 ... done
[root@host131 cerebro]# docker-compose ps
      Name                  Command            State           Ports
-----------------------------------------------------------------------------
cerebro_cerebro_1   /opt/cerebro/bin/cerebro   Up      0.0.0.0:9100->9000/tcp
[root@host131 cerebro]#
使用方法
访问cerebro服务
通过上述设定的9100端口访问cerebro服务,页面显示信息如下图所示
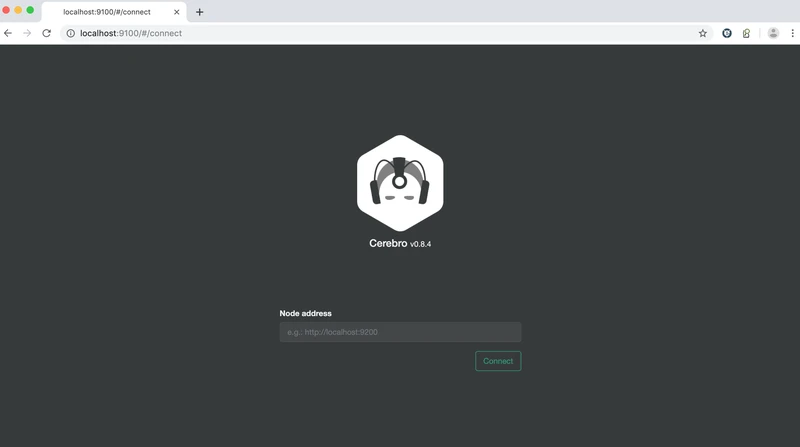
只需要输入ElasticSearch的URL并点击connect按钮,成功连接即可显示如下图所示信息。需要注意的是由于cerebro运行在容器中,直接输入localhost:9200即使通过浏览器能够访问也可能无法连接,需要保证的是在cerebro的容器中能够访问到的URL,比如这里使用的本机的IP

点击Connect按钮即可连接成功
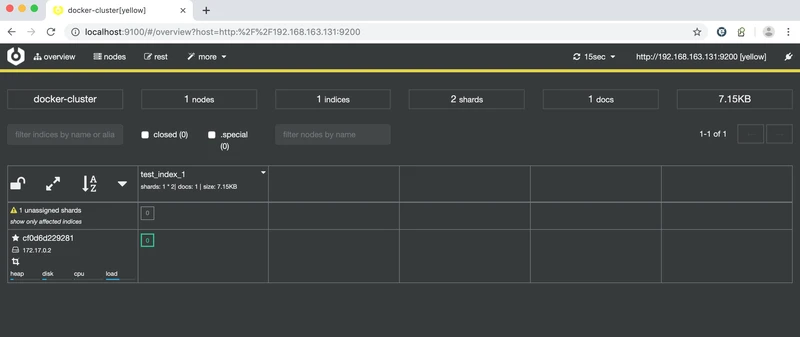
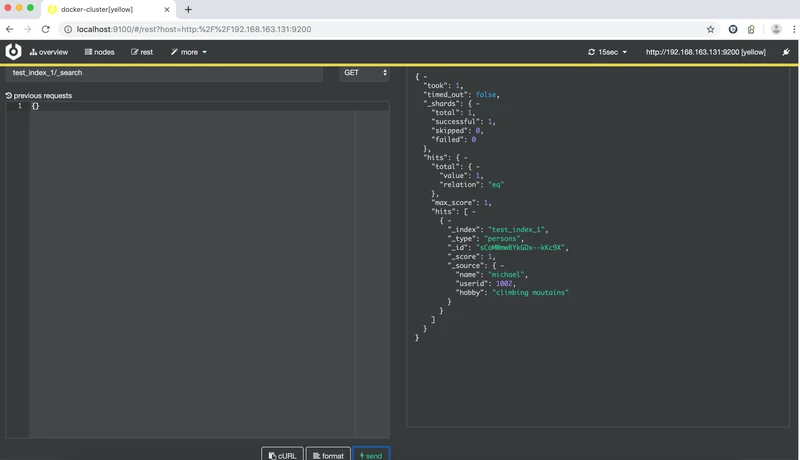
如果需要执行相应的API操作,比如查询,可直接在界面进行操作,比如
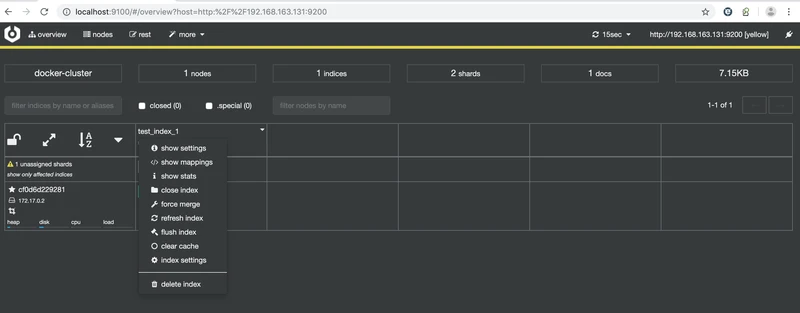
另外还可以确认节点相关的统计信息

很多操作都可以通过页面进行
总结
相较于elasticsearch-head,界面美感较好,功能也在不断更新,建议使用。
i18n(2019/12/24追加)
看了一下github上的介绍,目前的版本没有提及i18n的设定,拉下源码也没有看到相关设定。这里以登录界面的"Node address"显示为例进行确认是否提供多语言的支持。可以看到直接写死的的英文方式,所以目前的版本应该不支持中文。
[root@host132 ~]# git clone https://github.com/lmenezes/cerebro/
Cloning into 'cerebro'...
remote: Enumerating objects: 107, done.
remote: Counting objects: 100% (107/107), done.
remote: Compressing objects: 100% (82/82), done.
remote: Total 3662 (delta 34), reused 65 (delta 21), pack-reused 3555
Receiving objects: 100% (3662/3662), 2.17 MiB | 210.00 KiB/s, done.
Resolving deltas: 100% (2232/2232), done.
[root@host132 ~]# cd cerebro/
[root@host132 cerebro]# find  -type f |xargs grep 'Node address'
./public/connect.html:        <label for="host">Node address</label>
[root@host132 cerebro]#
从代码里面可以看出使用的是Angular早期的版本,还是AngularJS时代的前端框架,由于Angular本身国际化最终也是扶正了社区的ngx-translate,而代码中也未见到有国际化和本地化相关的设定,所以目前版本应该是无法简单地支持中文的
[root@host132 cerebro]# cat public/connect.html
<div class="row" style="padding-top: 80px; padding-bottom: 60px;">
<div class="col-xs-12 text-center">
<img src="img/logo.png" height="160px">
<h4>Cerebro
<small>{{appVersion}}</small>
</h4>
</div>
</div>
<div style="max-width: 400px; margin-left: auto; margin-right: auto">
<div class="text-center">
<span>
<p>
<span ng-show="connecting">
<i class="fa fa-fw fa-circle-o-notch fa-spin"> </i> Connecting...
</span>
<span class="text-danger" ng-show="feedback">
{{feedback}}
</span>
</p>
</span>
</div>
<div ng-hide="unauthorized">
<div ng-show="hosts.length > 0">
<table class="table">
<thead>
<tr>
<th>Known clusters</th>
</tr>
</thead>
<tbody>
<tr ng-repeat="host in hosts | orderBy track by $index">
<td class="normal-action" ng-click="connect(host)">
<span>{{host}}</span>
</td>
</tr>
</tbody>
</table>
</div>
<form>
<div class="form-group">
<label for="host">Node address</label>
<input id="host" type="text" ng-model="host"
class="form-control form-control-sm"
placeholder="e.g.: http://localhost:9200"
ng-enter="connect(host)">
</div>
<button type="submit" class="btn btn-success pull-right"
ng-click="connect(host)"
ng-disabled="!host">
Connect
</button>
</form>
</div>
<div ng-show="unauthorized">
<form>
<div class="form-group">
<label for="username">Username</label>
<input id="username" type="text" ng-model="username"
class="form-control form-control-sm"
placeholder="admin"
ng-enter="authorize(host, username, password)">
</div>
<div class="form-group">
<label for="password">Password</label>
<input id="password" type="password" ng-model="password"
class="form-control form-control-sm"
ng-enter="authorize(host, username, password)">
</div>
<button type="submit" class="btn btn-success pull-right"
ng-click="authorize(host, username, password)">
Authenticate
</button>
</form>
</div>
</div>
[root@host132 cerebro]#
参考内容
https://github.com/lmenezes/cerebro
