目录
1. 概述
2. 模块设计
5. 设计Block的主要接口
6. 启动游戏
7. 实现游戏的主体架构
7.1 实现游戏的主体架构
7.2 补充私有数据成员
7. 3 补充私有成员函数
7.4 完善游戏主体架构
9. 绘制方块
10. 实现游戏场景
10.1 游戏过程中数据的存储
10.2 数据数据的初始化
10.4 测试游戏场景
11. 完善方块的渲染
11.1 新方块和预告方块的创建
11.2 渲染方块
12. 俄罗斯方块的降落
13. 实现俄罗斯方块的左右移动
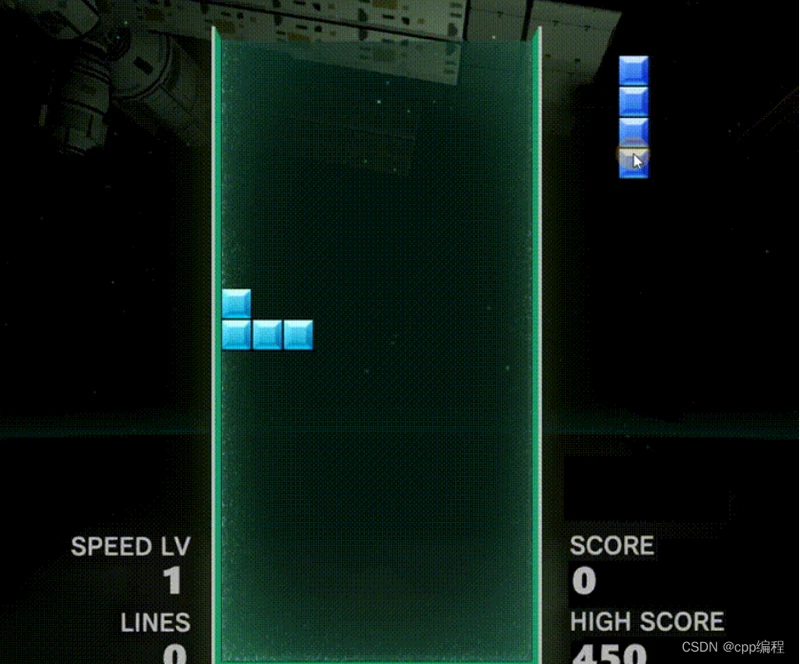
本教程配套视频
1. 概述
使用C++面向对象思想开发俄罗斯方块游戏。
2. 模块设计

3. 创建项目
本教程配套视频
添加类Block和Tetris
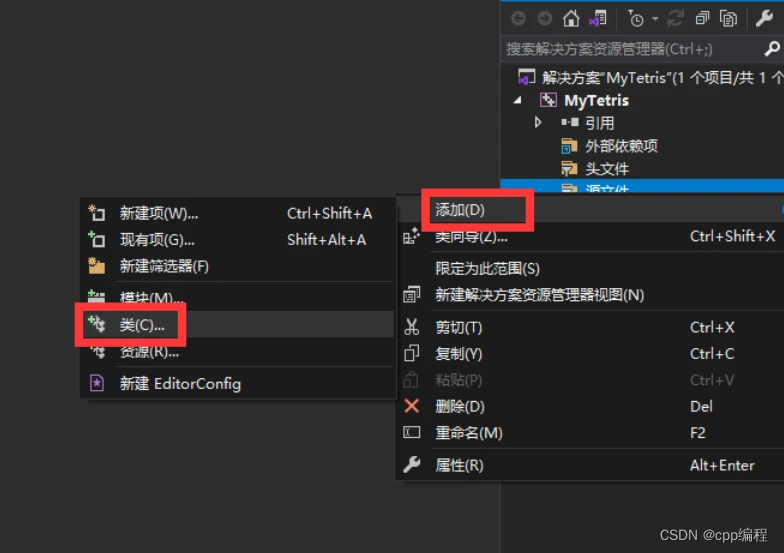
4. 设计Tetris的主要接口
本教程配套视频
Tetris.h
class Tetris
{
public:
	Tetris(int rows, int cols, int left, int top, int blockSize);
	void init();
	void play();
};
5. 设计Block的主要接口
Block.h
#include <graphics.h>
class Block
{
public:
	Block();
	void drop();
	void moveLeftRight(int offset);
	void retate(); //旋转
	void draw(int leftMargin, int topMargin);
};
6. 启动游戏
main.cpp
#include "Tetris.h"

int main() {
	Tetris game(20, 10, 56, 58, 36);
	game.play();
	return 0;
}
7. 实现游戏的主体架构
7.1 实现游戏的主体架构
Tetris.cpp
void Tetris::play()
{
    init();

    int timer = 0;
    while (1) {
        keyEvent(); //待定义

        timer += getDelay();   //待定义
        if (timer > delay) {   //delay待定义
            timer = 0;
            drop();            //待定义
            update = true;     //待定义
        }

        if (update) {
            update = false;
            updateWindow();  //待定义
            clearLine();     //待定义
        }
    }
}
7.2 补充私有数据成员
Tetris.h
private:
	int delay;
	bool update;
7. 3 补充私有成员函数
Tetris.cpp
private:
	void keyEvent();
	int getDelay();
	void drop();
	void updateWindow();
	void clearLine();
7.4 完善游戏主体架构
游戏开始时,需要创建新方块,以及下一个方块的预告。
添加新的数据成员
Tetris.h
	Block* curBlock;
	Block* nextBlock; //方块预告
以上两个数据成员都是private权限,并需要补充头文件Block.h
Tetris.h
#include "Block.h"完善游戏主题架构
void Tetris::play()
{
    init();

    nextBlock = new Block;
    curBlock = nextBlock;
    nextBlock = new Block;

    // ...
}
8. 创建新方块
在调用 new Block 时,会自动调用Block的默认构造函数,所以我们需要在这个构造函数里面完成新方块的创建。
俄罗斯方块的表示方法有很多,最常见的是使用一个二维数组,表示一种俄罗斯方块的某种形态,也就是说,一个俄罗斯方块,需要使用4个二维数组来表示各个形态(4个方向)。我们这里使用一个更灵巧的方式:
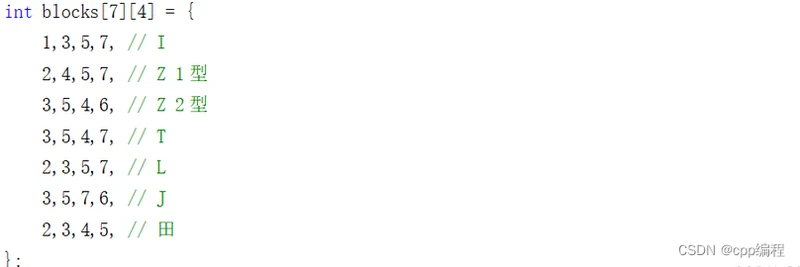
Block.h
struct Point {
	int row;
	int col;
};

class Block
{
public:
	Block();
	void drop();
	void moveLeftRight(int offset);
	void retate(); //旋转
	void draw(int leftMargin, int topMargin);

	int getBlockType();

private:
	int x;
	int y;
	int blockType;
	Point smallBlocks[4];
	IMAGE* img;

private:
	static int size;
	static IMAGE* imgs[7];
};
注意,在这里,我们把所有的方块图像,定义为Block类的static数据成员.
IMAGE* Block::imgs[7] = { NULL, };
int Block::size = 36;

Block::Block()
{
	// 仅初始化一次
	if (imgs[0] == NULL) {
		IMAGE imgTmp;
		loadimage(&imgTmp, "res/tiles.png");
		SetWorkingImage(&imgTmp);
		for (int i = 0; i < 7; i++) {
			imgs[i] = new IMAGE;
			getimage(imgs[i], i * size, 0, size, size);
		}
		SetWorkingImage();
		srand(time(NULL));
	}

	// 以下,对每个新创建的方块,都要执行:
	blockType = 1 + rand() % 7;
	img = imgs[blockType - 1];

	int blocks[7][4] = {
		1,3,5,7, // I
		2,4,5,7, // Z 1型
		3,5,4,6, // Z 2型
		3,5,4,7, // T
		2,3,5,7, // L
		3,5,7,6, // J
		2,3,4,5, // 田
	};
	for (int i = 0; i < 4; i++) {
		smallBlocks[i].row = blocks[blockType - 1][i] / 2;
		smallBlocks[i].col = blocks[blockType - 1][i] % 2;
	}
}
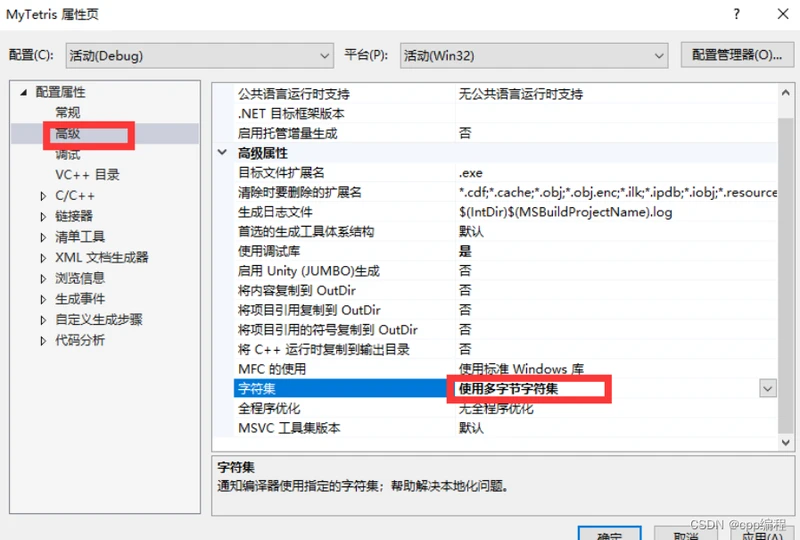
同时把项目属性的字符集,修改为多字节字符集。
9. 绘制方块
绘制正在降落过程中的方块。
void Block::draw(int leftMargin, int topMargin)
{
	for (int i = 0; i < 4; i++) {
		int x = smallBlocks[i].col * size + leftMargin;
		int y = smallBlocks[i].row * size + topMargin;
		putimage(x, y, img);
	}
}
10. 实现游戏场景
10.1 游戏过程中数据的存储
添加以下数据成员,用来表示游戏的状态数据,用一个二维数组来表示各个位置的状态。
	int rows;
	int cols;
	int leftMargin;
	int topMargin;
	int blockSize;
	IMAGE imgBg;
	vector<vector<int>> map;
10.2 数据数据的初始化
在Tetris类的构造函数中,对游戏数据进行初始化。
Tetris::Tetris(int rows, int cols, int left, int top, int blockSize)
{
    this->rows = rows;
    this->cols = cols;
    this->leftMargin = left;
    this->topMargin = top;
    this->blockSize = blockSize;

    for (int i = 0; i < rows; i++) {
        vector<int> row;
        for (int j = 0; j < cols; j++) {
            row.push_back(0);
        }
        map.push_back(row);
    }
}
10.3 初始化游戏场景
const int SPEED_NORMAL = 500; //普通速度
const int SPEED_QUICK = 50;   //快速降落速度

void Tetris::init()
{
    initgraph(640, 832);
    loadimage(&imgBg, "res/bg.jpg");

    delay = SPEED_NORMAL;

    for (int i = 0; i < rows; i++) {
        for (int j = 0; j < cols; j++) {
            map[i][j] = 0;
        }
    }
}
10.4 测试游戏场景
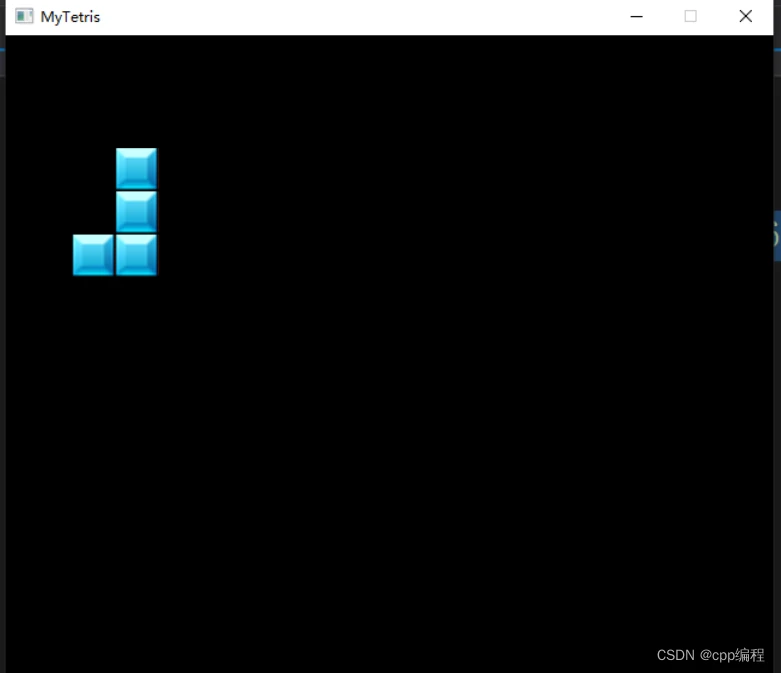
已经定义很多成员函数,但是大部分都还没有做具体的实现,现在把这些成员函数都补充一个空的函数体,以便测试,后面再详细实现各个函数接口。
修改main函数,添加测试代码:
int main() {
	Tetris game(20, 10, 56, 58, 36);

	//game.play();

	game.init();
	Block block;
	block.draw(56, 58);
	system("pause");

	return 0;
}
执行效果如下:
11. 完善方块的渲染
11.1 新方块和预告方块的创建
在7.4中已经实现了新方块和预告方块的定义和创建。
11.2 渲染方块
在Block类中添加接口getImages, 以获取各种方块的图形纹理。
//Block.h
class Block {
public:
    static IMAGE** getImages();
    ......
}
添加getImages的实现:
//Block.cpp
IMAGE** Block::getImages()
{
	return imgs;
}
渲染俄罗斯方块:
void Tetris::updateWindow()
{
	BeginBatchDraw();

	putimage(0, 0, &imgBg);

	IMAGE** imgs = Block::getImages();
	for (int i = 0; i < rows; i++) {
		for (int j = 0; j < cols; j++) {
			if (map[i][j] == 0) continue;
			int x = j * blockSize + leftMargin;
			int y = i * blockSize + topMargin;
			putimage(x, y, imgs[map[i][j] - 1]);
		}
	}

	curBlock->draw(leftMargin, topMargin);
	nextBlock->draw(689, 150); //绘制预告方块

	EndBatchDraw();
}
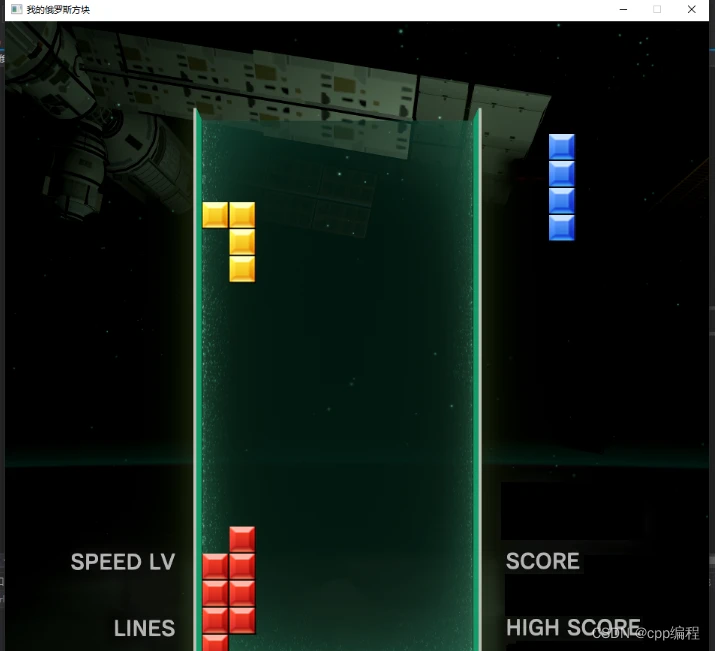
12. 俄罗斯方块的降落
在Tetris类中添加数据成员,用来备份当前正在降落的俄罗斯方块,以便让俄罗斯方块进入非法位置后进行还原。
Block bakBlock;实现俄罗斯方块的降落操作:
void Tetris::drop()
{
	bakBlock = *curBlock;
	curBlock->drop();


	if (!curBlock->blockInMap(map)) {
		bakBlock.solidify(map);
		delete curBlock;
		//curBlock = new Block;
		curBlock = nextBlock;
		nextBlock = new Block;
	}

	delay = SPEED_NORMAL; //每下将一次,就把降落速度还原成普通速度
}
补充实现Block的赋值构造函数:
Block& Block::operator=(const Block& other)
{
	if (this == &other) return *this;

	this->blockType = other.blockType;
	for (int i = 0; i < 4; i++) {
		this->smallBlocks[i] = other.smallBlocks[i];
	}

	return *this;
}
补充实现Block的固化功能:
void Block::solidify(vector<vector<int>>& map)
{
	for (int i = 0; i < 4; i++) {
		// 设置标记,“固化”对应位置
		map[smallBlocks[i].row][smallBlocks[i].col] = blockType;
	}
}
测试效果:
13. 实现俄罗斯方块的左右移动
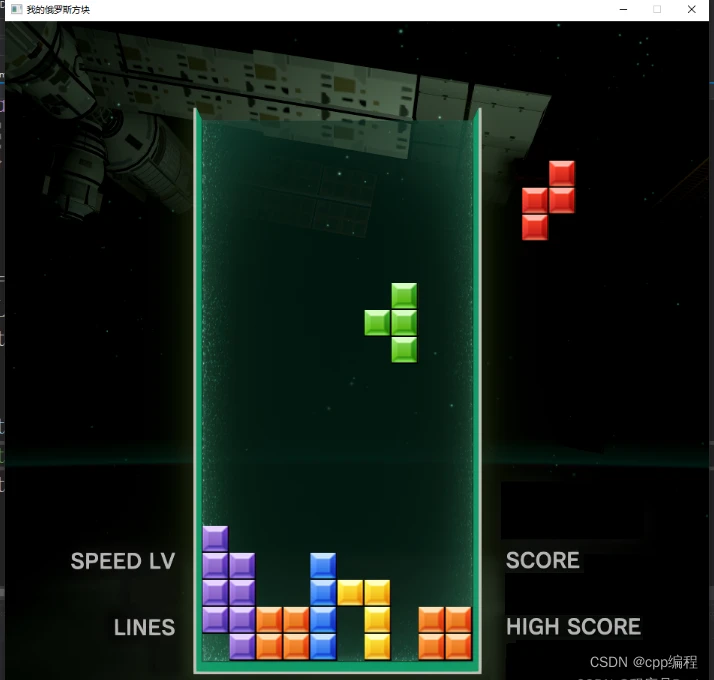
在之前的按键事件处理中,实现左右移动:
void Tetris::keyEvent()
{
	int dx = 0;
	bool rotateFlag = false;
	unsigned char ch = 0;

	while (_kbhit()) {
		unsigned char ch = _getch();
		if (ch == 224) {
			ch = _getch();
			switch (ch) {
			case 72:
				rotateFlag = true;
				break;
			case 80:
				delay = SPEED_QUICK; //快速降落
				break;
			case 75:
				dx = -1;
				break;
			case 77:
				dx = 1;
				break;
			default:
				break;
			}
		}
	}

	if (dx != 0) {
		moveLeftRight(dx);
		update = true;
	}

	if (rotateFlag) {
		//rotate();
		//update = true;
	}
}
添加内部成员函数moveLeftRight:
void Tetris::moveLeftRight(int offset) {
	bakBlock = *curBlock;
	curBlock->moveLeftRight(offset);


	if (!curBlock->blockInMap(map)) {
		*curBlock = bakBlock;
	}
}
实现Block类的moveLeftRight
void Block::moveLeftRight(int offset)
{
	for (int i = 0; i < 4; i++) {
		smallBlocks[i].col += offset;
	}
}
测试效果:
14. 实现旋转变形(待更新)
今天的分享就到这里了,大家要好好学C语言/C++哟~
欢迎转行和学习编程的伙伴,利用更多的资料学习成长比自己琢磨更快哦!
对于准备学习C/C++编程的小伙伴,如果你想更好的提升你的编程核心能力(内功)不妨从现在开始!
整理分享(多年学习的源码、项目实战视频、项目笔记,基础入门教程)加下方群获取哦~
C语言C++编程学习交流圈子,QQ群:763855696【点击进入】
C语言从入门到精通(C语言入门C语言教程C语言零基础C语言基础C语言学习C
